How to Enable or Disable Two-Factor Authentication on iOS 11?

iDevice Users ေတြသိသင့္မယ္ထင္လို႔မွ်ေဝေပးလိုက္ပါရေစ။ iOS 11 မွာစၿပီး Two-Factor Authentication လို႔ေခၚတ့ဲ Apple ID ကိုလံုျခံဳေစ ရန္ဖုန္းနံပါတ္ျဖင့္ Verification ျပဳလုပ္ေပးရတ့ဲ Feature ေလးပဲျဖစ္ပါတယ္။ တခ်ိဳ႕ User ေတြက မိမိရဲ႕ Apple ID ကိုအျခားသူယူသံုးမွာစိုးရိမ္ၾကရင္ျဖင့္ ဒီ feature ေလးကိုသံုးႏိုင္ပါတယ္။ မိမိ Apple ID မွာ မိမိဖုန္းျဖင့္ Two-Factor ခံထားရင္ Apple ID ဝင္တာနဲ႔ မိမိဖုန္းကို Verification code ပို႔ေပးမွာျဖစ္ၿပီး ၎ code ျဖင့္ဝင္ေရာက္ရမွာျဖစ္ပါတယ္။ ဒီ feature ေလးကိုၾကဳိက္တ့ဲသူရွိသလိုမႀကိဳက္တ့ဲသူလည္းရွိပါတယ္။ ႀကိဳက္တ့ဲသူေတြကဘယ္လိုလုပ္ႏိုင္မလဲၾကည့္ၾကရေအာင္။
Enable Two-Factor Authentication
၁) Setting > iCloud ထဲဝင္ပါ။

၂) iCloud ထဲက Password & Secutiry ထဲဝင္ပါ။

၃) ၿပီးပါက Turn On Two-Factor Authentication ကို On ပါ။

၄) ၿပီးပါက ေပၚလာတ့ဲေနရာမွာ continue ဆက္တိုက္လုပ္ေပးလိုက္ပါက two-factor ကို on ၿပီးၿပီျဖစ္ပါတယ္။
Disable Two-Factor Authentication
၁) ေအာက္ပါလင့္ကိုဝင္ၿပီးမိမိ Apple ID ကို verification code ထည့္ၿပီးဝင္ပါ။
Apple ID ဝင္ရန္လင့္
၂) security ထဲဝင္ပါ။

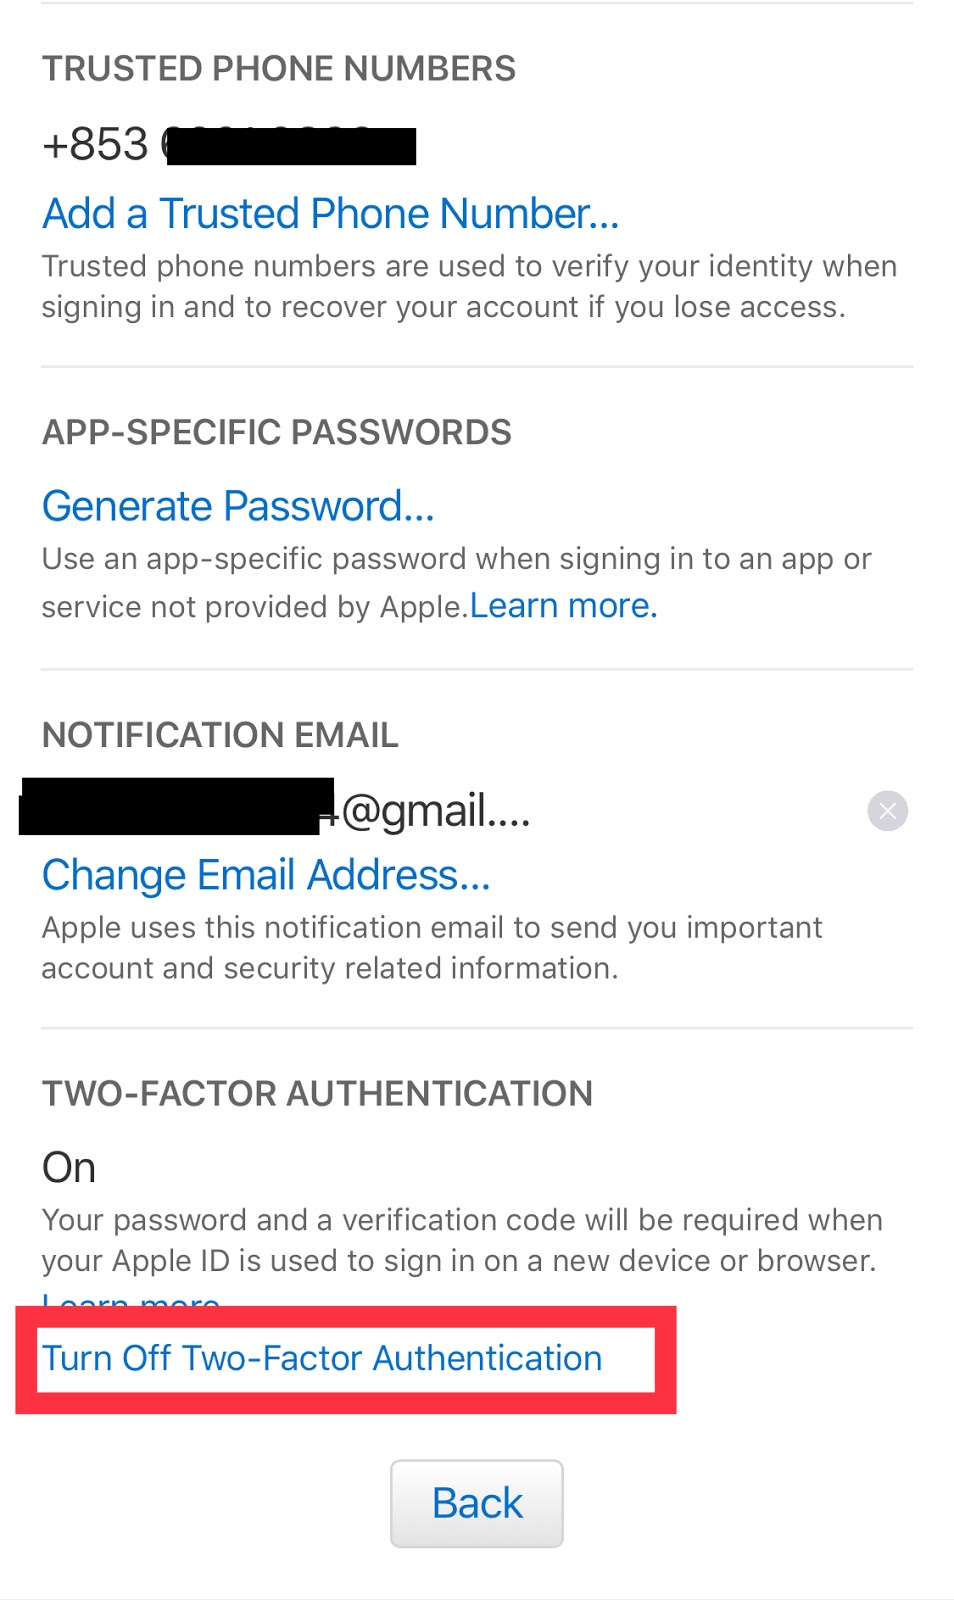
၄) Continue ဆိုတာႏွိပ္ၿပီး security question မ်ားကိုျဖည့္ေပးၿပီး Next ႏွိပ္ပါ။


၅) Birthday ႏွင့္ Email ေနရာတြင္ Next ႏွိပ္ၿပီး Done လုပ္ေပးပါက Two-Factor Turn Off ၿပီးၿပီျဖစ္ပါတယ္။

ဒီနည္းေလးက မိမိ Apple ID ရဲ႕ Security နဲ႔ Trusted phone ကိုသိပါမွျပဳလုပ္ႏိုင္မွာျဖစ္ပါတယ္။
အားလံုးပဲအဆင္ေျပၾကပါေစခင္ဗ်ာ။
No comments:
Post a Comment